WHMCS comes with a predefined set list of template tags that can be used by 3rd party scripts such as the Banner Manager to insert custom display outputs, but it only covers a small percentage of areas. The Banner Manager (from version 1.3.0) allows you to add your own custom tags and place these tags into the template (.tpl) files to allow easy display of your banners, alerts and raw HTML.
Step 1 - Create your banner
- Access the Banner Manager in your WHMCS admin, and create a new banner
- From the drop down for 'Banner Target' select the 'Custom Client Area Template Tag Target' option
- Enter what you would like your template tag to be named and used in your template file. Please note, all special characters (including spaces) will be removed and by default the plugin will prefix your named tag with 'Custom' to avoid conflicts. You can override this by unchecking the 'Append 'Custom' to the start of the tag' option.
- Continue with the other fields and steps as per any normal banner
Step 2 - Add your newly created tag to your template file
You will need to use a file manager or FTP software to edit upload/save your edits.
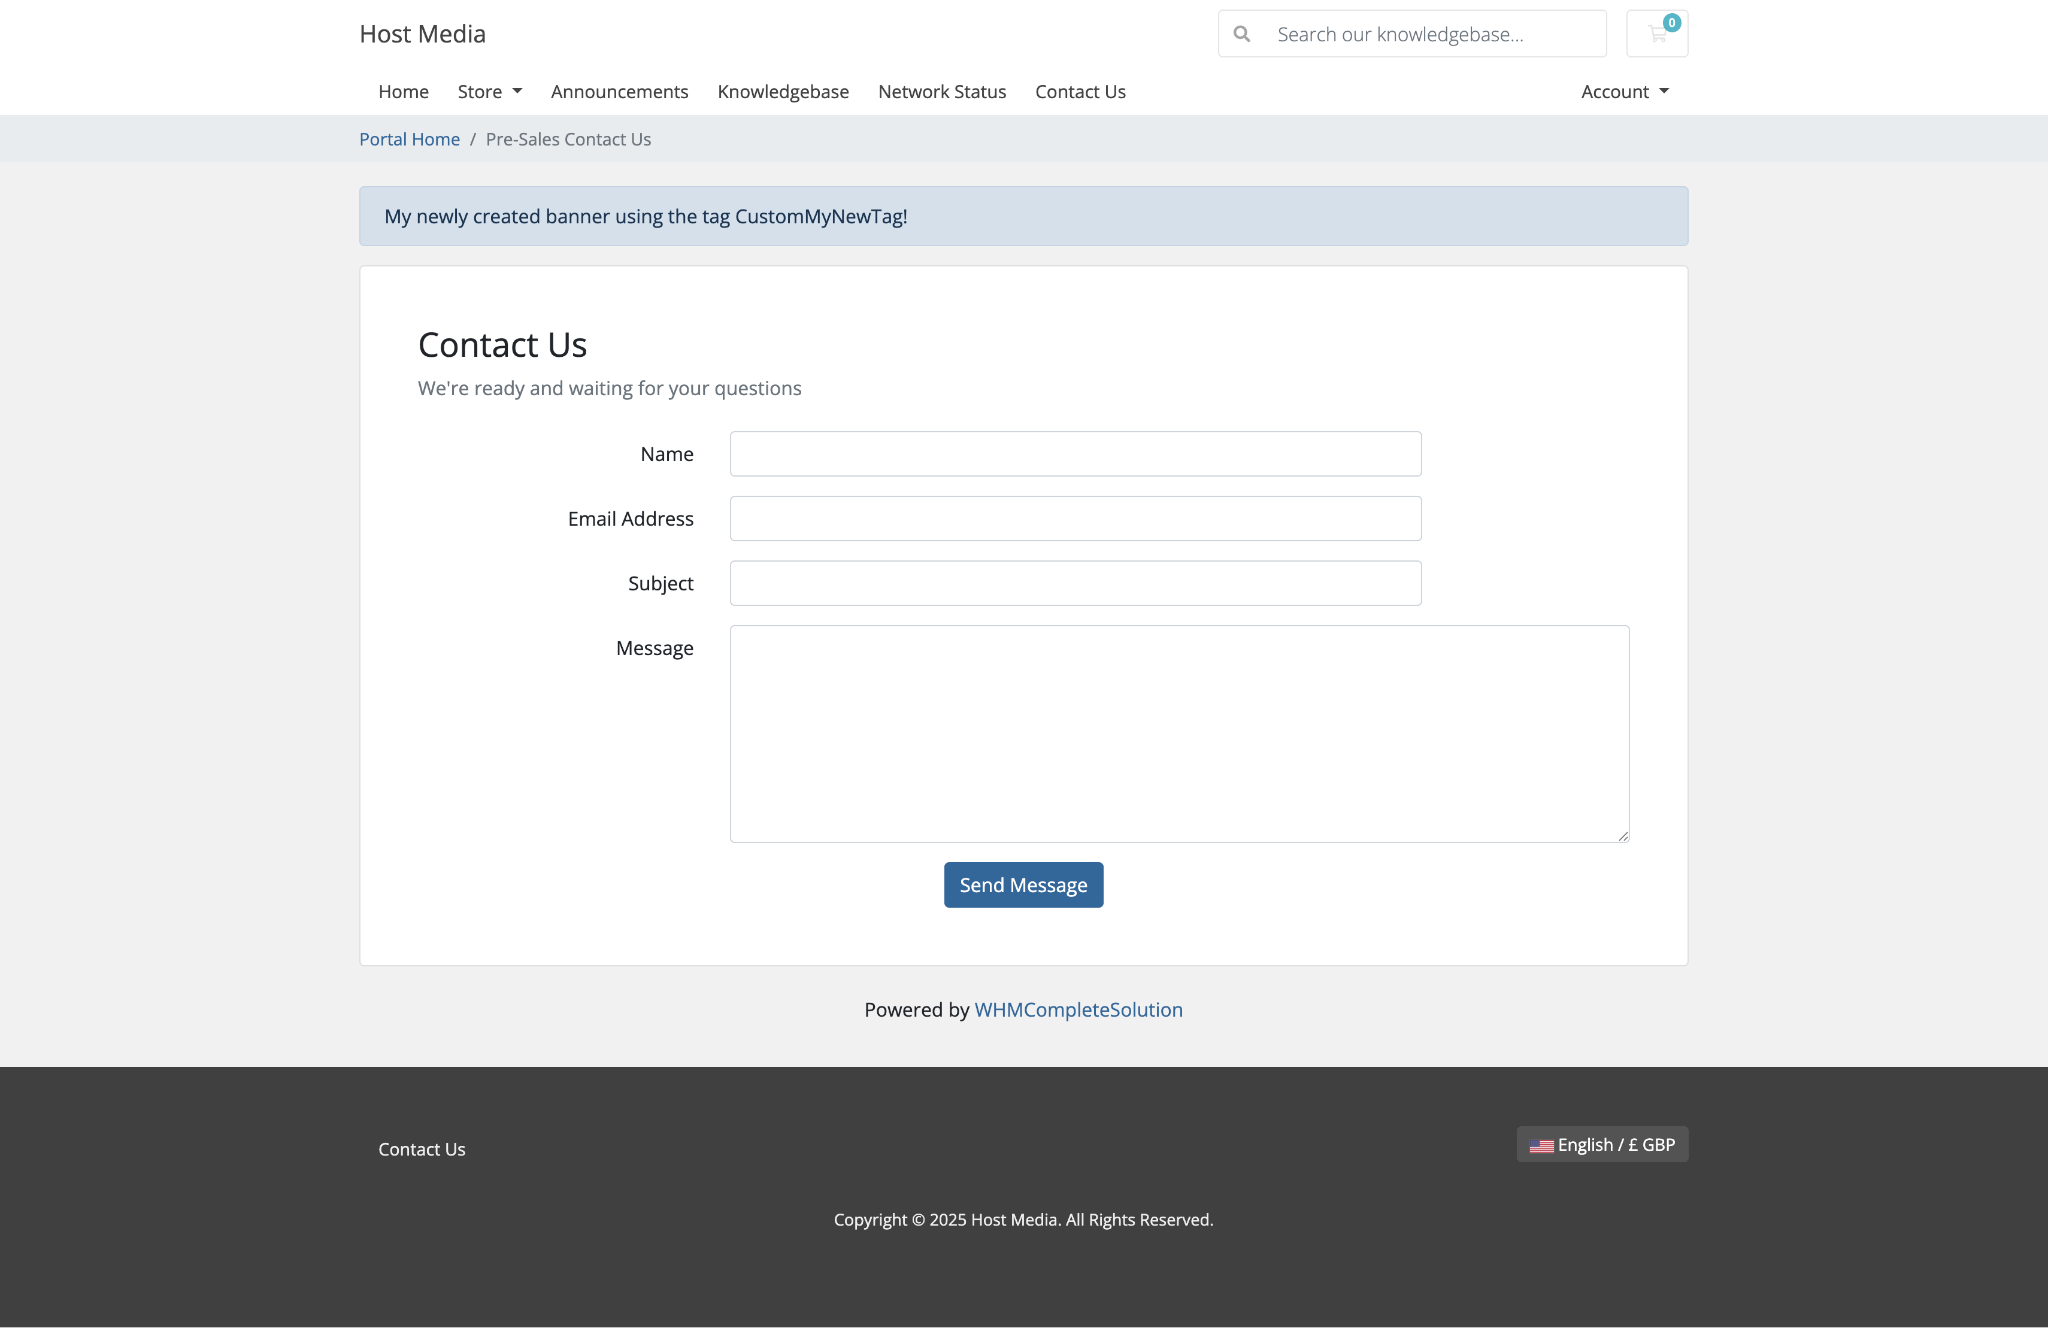
For our example case, we have created a new tag named "CustomMyNewTag" and would like to add it to the contact form page (whmcsinstall.com/contact.php) of our WHMCS site.
- Using a file manager or editor, locate your WHMCS theme template folder, for the default theme it would be 'WHMCS-DIRECTORY/templates/twenty-one'
- NOTE: We recommend using a custom theme for your own template and using the Twenty One theme as the base theme. You can read WHMCS documentation on creating a child theme at https://developers.whmcs.com/themes/getting-started/
- In our case we would open the file 'contact.tpl' and we want our banner to appear right at the top of the content area. We would add the tag as '{$CustomMyNewTag}', below you can see the full template and our new tag added at the top. The tag can go anywhere within the template file.
{$CustomMyNewTag} <div class="card mb-4"> <div class="card-body extra-padding"> <div class="mb-4"> <h6 class="h3">{lang key='contactus'}</h6> <p class="text-muted mb-0">{lang key='readyforquestions'}</p> </div> {if $sent} {include file="$template/includes/alert.tpl" type="success" msg="{lang key='contactsent'}" textcenter=true} {/if} {if $errormessage} {include file="$template/includes/alert.tpl" type="error" errorshtml=$errormessage} {/if} {if !$sent} <form method="post" action="contact.php" role="form"> <input type="hidden" name="action" value="send" /> <div class="form-group row"> <label for="inputName" class="col-sm-3 col-form-label text-right font-">{lang key='supportticketsclientname'}</label> <div class="col-sm-7"> <input type="text" name="name" value="{$name}" class="form-control" id="inputName" /> </div> </div> <div class="form-group row"> <label for="inputEmail" class="col-sm-3 col-form-label text-right">{lang key='supportticketsclientemail'}</label> <div class="col-sm-7"> <input type="email" name="email" value="{$email}" class="form-control" id="inputEmail" /> </div> </div> <div class="form-group row"> <label for="inputSubject" class="col-sm-3 col-form-label text-right">{lang key='supportticketsticketsubject'}</label> <div class="col-sm-7"> <input type="text" name="subject" value="{$subject}" class="form-control" id="inputSubject" /> </div> </div> <div class="form-group row"> <label for="inputMessage" class="col-sm-3 col-form-label text-right">{lang key='contactmessage'}</label> <div class="col-sm-9"> <textarea name="message" rows="7" class="form-control" id="inputMessage">{$message}</textarea> </div> </div> {if $captcha} <div class="text-center margin-bottom"> {include file="$template/includes/captcha.tpl"} </div> {/if} <div class="text-center"> <button type="submit" class="btn btn-primary{$captcha->getButtonClass($captchaForm)}">{lang key='contactsend'}</button> </div> </form> {/if} </div> </div> - Testing the change will get you a result of:
If you have any issues or questions please feel free to reach out to the development team for support.
